DIY-Sit/Stand Desk
- Mariam
- Jan 2, 2021
- 6 min read
Updated: Feb 15, 2023
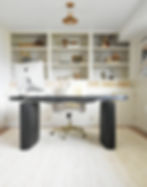
I have been looking for a pretty sit/stand desk since they gave me one in my office. However, up until COVID, I never worked from home and didn't have much need to have one. I just had a simple IKEA white desk that I would rarely use for online browsing.
However, the WFH began, I started to look for a sit/stand desk that would be large, look like a normal wooden desk, and have the capabilities of an electric one. Unfortunately, my search didn't turn out as planned and I ended up finding none that fit all my criteria.
I found a few decent-looking ones in Pottery Barn and Crete & Barrel, however, both of them were manually operated and a little bit above my budget. I liked them but I really wanted the ease of the electric button that would move the desk up and down within the seconds. So after little thinking, I decided to make one!
After the decision was made, I sat for a few minutes thinking/imagining of what were the possibilities to make it work, after a few minutes, the solution was there! I knew how to make it work.
And I ran out of the room with "Happy" news to my husband that he had a new building project coming. He said I was totally crazy but here is how we made it work.
Step 1: Buy the Electric Sit/Stand Table Base
Buy the base of the electric table. I was searching for the large base and the best deal I found that was still in stock was the IKEA Bekant Electric Sit/Stand desk. You can find it here.
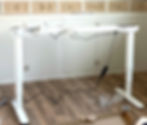
The casing for the table consists of 3 parts. We decided to first build the tabletop and make sure it fits and works correctly and then wrap up the legs.
Step 2: Making the Tabletop
We wanted a tabletop that would have an oval shape to bring a little bit of feminine appearance to the room.
1. We bought a piece of 3/4 inch birch plywood and using a circular saw cut the rectangle that was closest to the dimensions that we wanted about 27" which is standard x 60". Try to buy either birch or oak depending on your preference.

Once we had the main rectangle then we needed to make the sides thicker. I wanted the table to go over the tabletop base and cover the brackets. After measuring the thickness that would give us the look I was trying to achieve, without looking ridiculously thick, we decided to go for 2 additional pieces thick glued together. Keep in mind less is more and try to keep the weight down as this will all be top-heavy.
2. We measured the top of the tabletop where the table would be mounted and then added about an inch on each side for the wiggle room. Then using wood glue, we added two additional layers of plywood on the edges. Once it was all glued, we put wood clamps on and left it overnight to dry.

3. Using the top of the trash can we drew the rounded shape on the edges that we wanted and cut it with the jigsaw. You have to make sure all sides are equal and match your desired shape. The easiest way is to add markings on the lid or circular object so when you stencil onto the project, every corner is equal. then used a standard jigsaw with a longer blade to cut our lines. Be careful because a Jigsaw unlike the bandsaw tends to flex away from the cut so take it slow.

4. Once everything was cut, we sanded the edges of the fresh-cut plywood with 40 grit sanding paper and worked out way up to 250 grit (lower the grit, rougher the sanding paper). Once we saw the texture was close to what we were going for, we wiped down the entire tabletop with the damp cloth. let it dry, and then sand again with 250 grit. This causes the grains to raise and be sanded smooth and give a much better appearance when stained.
5. Then we moved it back home and secured it to the electric table base.

STEP 3: Making the Table Leg Casings
1. Once the tabletop was on, we measured the perfect sitting height for me. The only downside to putting the wooden leg frames on is that it restricts how low can the table go. So, we made sure we got the perfect height.
2. We took a 3/4 inch plywood rectangle that was closest to the table leg size and put it under one of the legs and drew the oval shape around it (make this oval your style). To make your custom oval you start by drawing a cross in the center to get your bearings and then you can use a circular object of a reasonable size to stencil the ends and connect the ends by flexing a thin piece of wood or metal to stencil an arch. When you make the oval keep in mind that if it is too long it will overhang the tabletop and too short will result in the table leg not fitting inside. Then once we had our first oval. We cut 3 more pieces of it using the jigsaw using the first as a template for the rest. two sets, of top and bottom parts.
3. Then we took the top ones and drilled a hole so that the moving table leg can easily move through it. Then we took the bottom ovals and jigsawed a large access hole that we will use to install the casings onto the desk. Also using regular sandpaper, ease the edge of the hole to allow the moving legs to not get caught on the edge of the hole.
4. Once we had the top and the bottom of the legs, we cut 4 rectangles from a 1/4 inch plywood sheet. We got the measurements by the predetermined height x the length of the oval that the plywood can bend too (basically cut the plywood as wide as possible until the turn is so sharp it can't bend any further). You can't bend the plywood much, it breaks very easily.
5. To attach the plywood sides, we took the bottom oval shape and glued and nailed it with the nail gun (both on the top and the bottom). However, to secure and bend on the sides we added additional scrap pieces of the wood in between and nailed the wood from outside because naturally, the middle part of the wood wants to flex outwards. Once the plywood sides were on, we put the wooden clamps on and left them to dry and bent overnight.
6. We had to cover the end parts of the legs that were too sharp of a curve for plywood. So we decided to use dowels to cover the remaining space.
We cut the dowels to the predetermined height and put wood glue on the oval ends and started putting the dowels on, one by one. Once each side was done (we used about 20 per side). As we progressed, we secured it with the painter's tape and left it overnight. In order for everything to glue well together, you have to give it some time and be very patient!
7. To install the casings we un-screwed the feet from the mechanism and slid the metal legs through the top of the casing and then re-attached the feet through the access hole on the bottom of the casing.
Step 4: Finish ( Stain & Sealant)
After the table structure was done and it looked and worked the way we wanted, it was time to put the color on. I knew I wanted the table to be dark, as the rest of the room is in a monochromatic cream and it was asking for some pop of color. Initially, the idea was to stain it in dark walnut, however, as we were trying to cover the edges of stacked plywood, we went with black.
1. We bought Minwax semi-transparent color stain in True Black for both leg casing and the tabletop. And black paint for the tabletop sides to conceal the plywood layers. Surprisingly, you can't see the difference when you look at it.
2. For the tabletop, we first put the stain with the sponge and then rubbed it in with the synthetic cloth. To get it darker, we did 2 coats but if you leave the stain longer without rubbing it in, you can achieve a dark color with just one coat.
3. For the leg casings, we put on one coat with the synthetic brush and didn't use the cloth. Both ended up exact same color.
4. After the stain, we put 3 coats of the Minwax Polyacrylic Ultra Flat sealant on the tabletop and one coat on the legs.
5. To finish off the project off we sanded the whole thing with 1000 grit sandpaper on an orbital sander to give a super smooth glass-like texture.
Below you can find the list of all the materials and tools that we used in this project:
Materials We used:
IKEA Bekant electric table base. (Here is the similar one: Here )
80 1/2 inch dowels. Instead of dowels, you can use pole wrap.
Black acrylic paint.
Tools we used:
*All our tools are from Dewalt and we love them but you can find a lot of cheaper alternatives.
Hope you will find this tutorial helpful!


